Table of content
1. Calves Deserve Care!
Getting taut calves is nothing new. Everyone at some point suffers from tight calves, whether they work these muscles out in the gym or not. Calves don’t have much of a choice in the activation department. You can’t spend all day in bed and to help you move around, your calf muscles compel you to move; becoming sore and achy afterward.
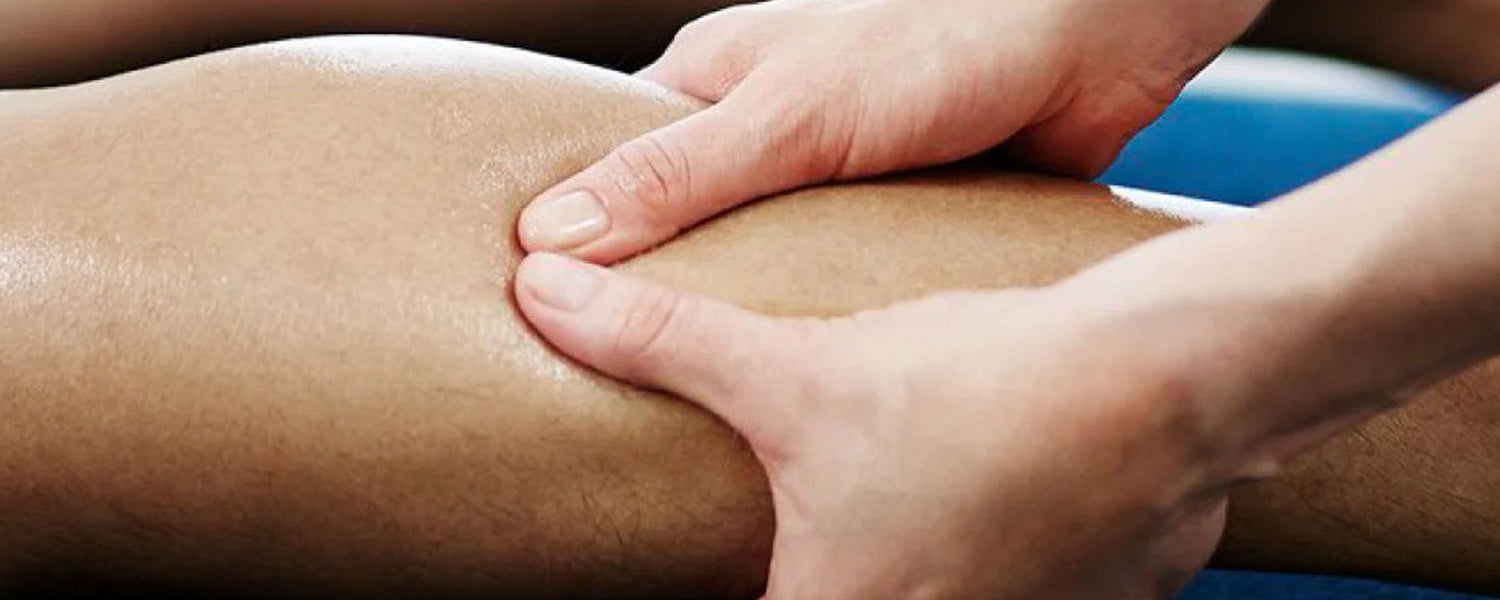
You can treat your hurting calves in various ways; the best being a massage. Massaging calves is a great way to show some love to your big, fatigue-stricken muscles.
2. Why Do Calf Muscles Need a Massage?

The human calf consists of two muscles. The “diamond-shaped,” protruding gastrocnemius bears the brunt of zealous movements and the secretive soleus beneath it supports postural standing.
These calf muscles have “trigger points,” the main areas of tightness. These points are also referred to as “knots.” Knots can cause prolonged stress and discomfort. These pains need to be fixed before they become a debilitating condition that could lead to long-term problems.
A good massage will help release these trigger points, relaxing and softening the muscles in the process.
Also read: What is the Correct Way to Do Calf Raises?
2.1. Common Trigger Points in Calf Muscles

- Gastrocnemius Muscle.
- Soleus Muscle and surrounding muscles.
- Tibialis Anterior.
- Tibialis Posterior.
3. Benefits of Massaging Calves

- Massaging helps relax your calves by improving the flow of oxygen into the blood and muscles.
- Improved circulation of your blood helps combat inflammation in the calf muscles. Furthermore, it maximizes the performance of your calf muscles.
- Massaging your calves with your hands creates friction and warmth. The temperature of your muscles rises as a result of improving tissue elasticity and flexibility.
- Massaging in long, gliding movements and rubbing the calf muscles gently unleashes any reserves of tension in them.
- Helps reduce musculoskeletal-related pains.
- Massaging calves has positive effects on the lymphatic system as it helps in flushing out toxins and lactic acid accumulated in the muscles.
- Stimulation of the lymphatic system through a massage prevents delayed onset muscle soreness (DOMS) in calves - stiffness felt a few hours (24-72 hours) after exercise.
- Massaging breaks down all the muscle adhesions that occur due to the formation of scar tissues. Scar tissues are areas that don’t heal properly, predisposing the muscle to major and minor tears. They are known to restrict movement and increase pain and stress.
- Breakdown of muscle adhesions greatly reduces pain.
“Self-massage breaks up adhesions before they cause problems.”
(Julia Kirtland, (1997 marathon champion), massage therapist, Portland, Maine) - The benefits of massaging calves are not restricted to calf muscles only.
4. Why Self-Massage Your Calves?
Simple, because it feels wonderful! We all love a good massage. It rejuvenates our bodies like nothing else. Whether you have had one before or not, the very notion of tackling those pain-exuding tight spots in your calves and freeing them from their misery is relaxing.
To get the job done, finding a massage therapist seems like the only option. But going to the spa and being touched by a stranger, not knowing how your aching body might react, can be quite a decision to make. Not to mention, it can be costly at times.
Does that mean you would have to deny relief to your calves? Of course not. This is where self-massage comes in.
5. How to Massage Calf Muscles?

5.1. Traditional Calf Massage
Thumb Technique
Don’t know how to begin massaging your calves? Simply follow this step-by-step guide to a simple massage by following these 3 easy steps and kneading out all the tension in your muscles.
- Sit down on the floor to reach your calves better. Bend your knee with your foot planted on the ground. Start at your ankles and stroke up the length of your calf, applying gentle pressure. Increase pressure little by little with every stroke.
- When you feel your muscles are softening, knead them using your fingertips and thumbs. Focus on the shape of your calves, feel the muscles under your tips. This will help you locate tight spots that are holding tension.
- Once you locate trigger spots, pay extra attention to release them. Use the pads of your thumbs to work your way through them. Trigger points might require more pressure to relax but aggressive kneading can cause damage. Striking the right balance is the key to well-massaged, relaxed muscles.
Knuckle Technique
Thumbs and fingers might not be enough at times to release all the knots. Pressing them hard into your calves can emit pain instead of relief. To apply a greater, sustained pressure, use the knuckle technique.
- Begin with the same positional set-up. To deeply massage your muscles and hit target points effectively, simply replace your thumbs with your knuckles.
- Place one hand flat on one side of your calf to provide support. Make a fist with your other hand, pressing the knuckles into your sore muscles, massaging upwards.
- Hitting your muscles lightly with your fists will help loosen deep trigger points.
(Always massage upward to promote blood circulation and to protect your blood vessels from damage- veins have one-way, upward valves in them).
Tips:
- Use olive oil for this gentle massage. It will absorb into the skin quickly and will allow your hands to glide more smoothly over the muscles, reducing friction.
- To massage diligently without overdoing it, you can opt to time yourself.
- Use your knuckles where you want to increase pressure, otherwise your thumbs should suffice.
6. How to Self-Massage Calves with Tools?
Various self-massage tools are available in the market that you should consider familiarizing yourself with.
- Lacrosse Ball
- Foam Roller
- Floss Bands
- Barbell
- Massage Gun
6.1. Lacrosse Ball
Some trigger points in the calves are quite painful and stubborn. If the thumb or knuckle technique fails, which can happen considering these key points are tough nuts to crack, use Lacrosse balls instead. This is an effective and inexpensive tool that will help you massage your calves thoroughly.
A lacrosse ball will help you identify the trigger points. Once you locate them, get to work using the following techniques:
Press Calf Muscles from Sides
- Sit on the floor as you would while performing a simple hand massage.
- Replace your knuckles with the Lacrosse ball.
- Apply pressure from one side, keeping one hand flat on the other side for support.
- Lacrosse makes it easy to apply pressure a bit more aggressively, something your knuckles cannot do without hurting yourself.
- Keep pressing the ball to get rid of all the sore points.
Put the Ball Under Your Calf
- Put the ball on the floor and then set your calf on top of it.
- Adjust the ball or your leg so that the Lacrosse ball is directly under the tender spot.
- Your leg will press down into the ball heavily, providing much-needed pressure.
(To increase pressure, place your other leg on top of the one being massaged) - Sit still, breathe deeply, and let the ball sink into your tight calves for 30 - 60 seconds Repeat with the other leg, if needed.
6.2 Foam Roller
Foam rolling is one of the most recognized massaging techniques right now. There is a fair chance you have already heard or read about it. It’s time to explore and implement this massaging technique. You can easily find foam rollers online if going to a sports store is too much effort. The fact that they are inexpensive is just the cherry on top.
Single Calf Foam Rolling
Increase the pressure to massage those unyielding, stiff muscles. The technique will hit the knots hard making it an almost unbearable massage.
- Sit on the floor. Now place the leg you want to massage on the foam roller.
- Put the other leg over it so that all of your body weight is applied to the calf being massaged.
- Roll the calf across the foam roller slowly.
- Continue for up to two minutes; do the same with the other leg.
- Repeat and alternate.
Double Calf Foam Rolling
Double-leg foam rolling is less intense compared to single-leg foam rolling. If you have extremely tight calves that are hypersensitive to pressure, then this technique will work best for you.
Here’s how to perform it:
- Sit on the floor and place both of your legs on the foam roller, your weight evenly distributed between both legs.
- Using your body weight, roll your calves across the massaging tool. Starting from the insertion (end) of the muscle - just above the ankles - and massage upwards all the way to the origin (head) of the muscle - just below the knee.
- Increase the amount of pressure on your calves by easing into the foam roller; pressing down using your body weight.
6.3. Floss Band

Before performing a massage using floss bands, check with your doctor for any cardiovascular disease, blood clots, or nerve disorder.
- Wrap a floss band around your calf muscles, wrap the band upward from your ankles to your knees. Secure the dangling end of the band inside the wrapped section.
- Wrap the band over itself twice so that the band stays in its place and also fully covers the muscle.
- Adjust the tension while pulling and wrapping the band. Start with 25% tension,, then increase pressure slowly over time.
- Let the band rest for some time. Now flex your ankle up and down.
- You should feel the muscle tissue flossing up under the band.
6.4. Barbell

For a quick pain fix and improved mobility, use an aggressive barbell massaging technique. Most gyms are equipped with barbells so you can treat calf tightness after workouts, too.
Let’s begin.
- Slide a spring-loaded collar on the barbell sleeve.
- Slowly roll the barbell up and down on your calves while holding onto the collar.
- The barbell sleeve should work on the bulk of the calves, targeting all the tender spots.
- The lower your barbell slides, the more sensitive your calves should feel.
Nothing massages your calves more effectively than a barbell.
6.5. Massage Gun

If you can afford and endure it, a massage gun will prove to be the best thing that ever happened to your tight calves. Massage guns come with interchangeable headpieces, so which one to use depends solely on your preference.
- Adjust the power settings according to your needs.
- Apply modest pressure on the bulk of your calves by moving the massage gun up and down over the muscles.
- Your muscles will become soft and warm due to the release of tense knots and the flow of blood, respectively.
- Keep massaging a particular spot for five to 10 minutes, then move on to the next.
7. Important Instructions for Calf Massage
There are some general guidelines to follow to get the most out of your massage.
7.1. Don’t Go Overboard
Moderation is the key to reaping the rewards of a massage. Nothing good comes out of massaging your muscles for too long. You will end up damaging muscle tissues. Contrarily, a few minutes every day should do the trick.
7.2. Don’t Invite More Pain
Tight, sore calf muscles might have little tears that have not fully healed. Bulldozing them with your hands may trigger inflammation. Be gentle. Don’t compromise your muscles just for the sake of having a massage.
“Massage does not have to hurt for it to work. Less can be a lot more.”
7.3. Aim to Relax
Muscles can be counterintuitive in the way they react to external stimuli. Exerting pressure on tight, contracted muscles will help them relax. But putting too much pressure too quickly will freeze them, resulting in a “shock.” They will become even stiffer in response. Apply pressure slowly, giving it time to adapt.
7.4. Use Specific Tools that Target Calves
Calf muscles are relatively smaller in size. Using large tools, i-e a 36’’ foam roller, to massage them will not hit the target points. Instead, use smaller tools such as a lacrosse ball.
7.5. Feel Up
If you are using massaging tools such as a small lacrosse ball, make sure to keep touching your muscles and check to see if they are faring well.
8. Reasons to Avoid Calf Massage
A calf massage is an easy way of treating all types of calf pain. However, if you suspect of suffering from a medical condition, seek advice from your doctor or avoid massages altogether.
- Presence of blood clots in a vein
- Bone diseases - osteoporosis, rheumatoid arthritis.
- Legs are swollen
- You are diabetic and suffer from peripheral neuropathy.
- You have varicose veins
- You are on medication.
9. Final Thoughts
Calves require pampering and due care. You don’t need elaborate calf-care routines to help ease any pain in your calves. A classic self-massage done for 5-10 minutes should be enough to prevent nasty calf conditions. Make sure you follow the instructions when self-massaging your calves to not cause them any harm;
especially if you are using massaging tools.
Also, if one technique doesn’t work for you, consider trying something else. You will eventually find out which massage strategies to adopt, combine, or leave out for the best results.
Photo Credit: @elenitroupi


Leave a comment
This site is protected by hCaptcha and the hCaptcha Privacy Policy and Terms of Service apply.